
Ultimate Guide: Simple Steps to Backup Your WordPress Website

Backing Up Your WordPress Website
Backup your WordPress website is crucial to ensure that you have a copy of all your website’s data in case of any unforeseen events such as server crashes, hacking, or accidental data loss. In this article, we will guide you through the process of backing up your WordPress website, complete with examples and images to help you understand the process better.
Using a Plugin to Back Up Your WordPress Website
One of the easiest and most popular ways to back up your WordPress website is by using a plugin. There are several plugins available that can automate the backup process and make it hassle-free for you. One such popular plugin is “UpdraftPlus”.
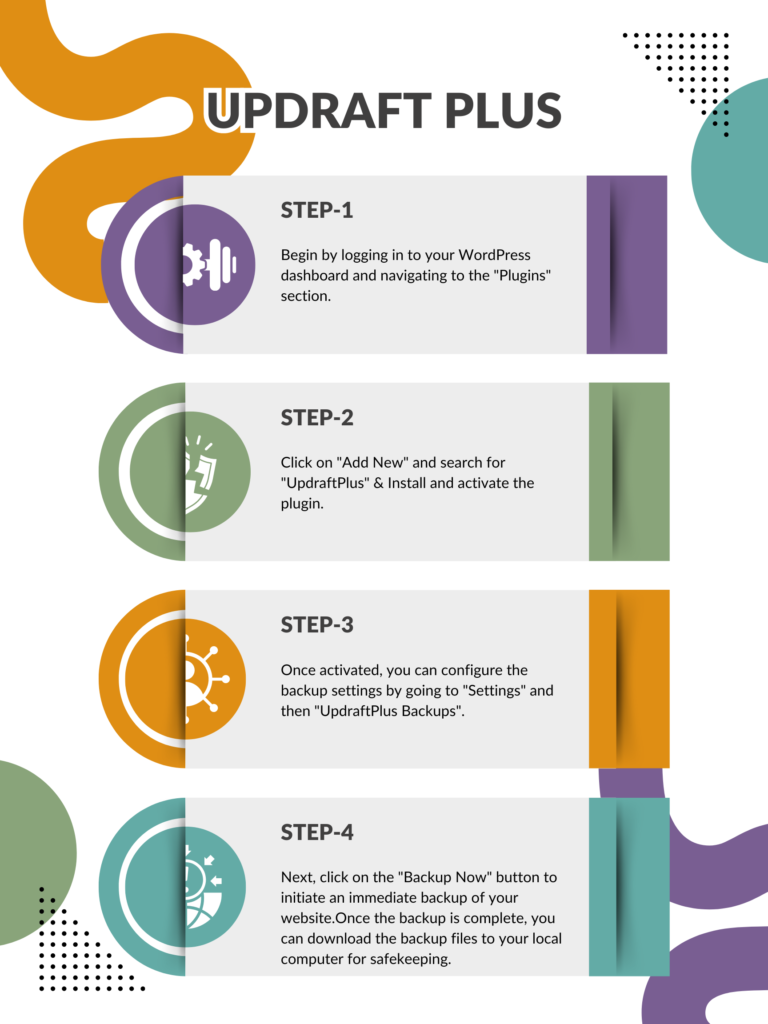
Below is an example of the backup process using UpdraftPlus:
- Begin by logging in to your WordPress dashboard and navigating to the “Plugins” section.
- Click on “Add New” and search for “UpdraftPlus”.
- Install and activate the plugin.
- Once activated, you can configure the backup settings by going to “Settings” and then “UpdraftPlus Backups”.
- Next, click on the “Backup Now” button to initiate an immediate backup of your website.
- You can also schedule regular backups by selecting the frequency of backups under the “Settings” tab.
- Once the backup is complete, you can download the backup files to your local computer for safekeeping.
Manual Backup of Your WordPress Website
If you prefer a more hands-on approach, you can also manually back up your WordPress website. This method involves backing up your website files via FTP and exporting your database through phpMyAdmin.
To back up your website files, connect to your web server using an FTP client such as FileZilla. Navigate to the root directory of your WordPress installation and download all the files to your local computer.
Here’s an example of the manual backup process using FTP and phpMyAdmin:
- Log in to your web hosting control panel.
- Access phpMyAdmin from the control panel.
- Select your WordPress database from the left-hand sidebar.
- Click on the “Export” tab.
- Choose the export method as “Quick” and the format as “SQL”.
- Click on “Go” to download the database backup file.
Also Read : 2024’s Top Web Hosting Services: A Comprehensive Comparison
Storing Your WordPress Website Backups
Once you have backed up your WordPress website, it’s essential to store the backup files securely. You can store the backup files in multiple locations to ensure redundancy and added security.
Some recommended storage options for your WordPress website backups include:
- Cloud storage services such as Google Drive, Dropbox, or Amazon S3
- External hard drives or USB drives
- Secure remote servers using FTP or SFTP
It’s important to store the backup files in different physical locations to safeguard against any physical damage or loss. Additionally, encrypting sensitive backup files adds an extra layer of security.
Testing Your WordPress Website Backups
Simply creating backups is not enough; you must also ensure that the backup files are functional and can be restored successfully. Regularly testing your WordPress website backups is crucial to verify their integrity.
To test your backups, create a test environment on a local server or a staging site and attempt to restore the backup files. Verify that all website elements such as themes, plugins, and content are intact and functioning correctly.
If the backup restoration process is successful, you can have peace of mind knowing that your WordPress website backups are reliable and can be relied upon in the event of an emergency.
Conclusion
Backing up your WordPress website is a fundamental aspect of website management. Whether you choose to use a plugin for automated backups or prefer the manual approach, the key is to have a robust backup strategy in place to protect your website’s data. Regularly backing up your WordPress website, storing the backup files securely, and testing the backups are essential steps to safeguard your website against any potential data loss or disruptions.
By following the guidelines provided in this article, you can ensure that your WordPress website is well-prepared to handle any unforeseen circumstances, allowing you to focus on running and growing your online presence with confidence.
Backing Up Your WordPress Database Separately
In addition to backing up your entire WordPress website, it’s also important to consider backing up your WordPress database separately. The database is the backbone of your WordPress site, storing all your content, user information, and settings.
One method to back up your WordPress database is by using a plugin like “WP Migrate DB Pro”. This plugin allows you to easily export your database and import it to a different location or environment. It also provides options to exclude specific tables or content from the backup, making the process more efficient.
To use WP Migrate DB Pro, install and activate the plugin in your WordPress dashboard. Then, navigate to the “Migrate” tab and click on the “Export” option. You can choose to export the entire database or select specific tables. Once the export process is complete, you can download the SQL file to your local computer.
Another option for backing up your WordPress database is to use the built-in phpMyAdmin tool in your hosting control panel. Follow the same steps as the manual backup process mentioned earlier, but this time, focus solely on exporting the WordPress database.
Regularly backing up your WordPress database can be particularly useful if you need to restore specific content or settings, or if you want to migrate your site to a different hosting provider or environment.
Backing Up WordPress Using Git
If you’re familiar with version control systems like Git, you can use it to manage and back up your WordPress website. Git is a powerful tool that allows you to track changes to your codebase, collaborate with other developers, and maintain a history of your project’s evolution.
To use Git for backing up your WordPress website, follow these steps:
- Install Git on your local machine if you haven’t already done so.
- Navigate to your WordPress installation directory using the terminal or command prompt.
- Initialize a new Git repository by running the command
git init. - Add all the files in your WordPress installation to the Git repository using the command
git add . - Commit the changes with a descriptive message using the command
git commit -m "Initial WordPress website backup". - Create a remote Git repository, such as on GitHub or GitLab, and add it as a remote to your local repository using the command
git remote add origin [remote_repository_url]. - Push your local repository to the remote repository using the command
git push -u origin master.
Now, every time you make changes to your WordPress website, you can easily commit the changes to your Git repository and push them to the remote repository. This way, you have a version-controlled backup of your entire WordPress codebase, including themes, plugins, and any custom code you’ve added.
If you ever need to restore your WordPress website, you can simply clone the Git repository to a new server or local environment and set up your WordPress installation from there.
Backing Up WordPress Using Cloud Storage Services
Another convenient way to back up your WordPress website is by using cloud storage services. These services provide a secure and reliable way to store your backup files, and they often offer features like automatic backups, version control, and easy restoration.
Some popular cloud storage services that you can use for WordPress backups include:
- Google Drive
- Dropbox
- Amazon S3
- Microsoft OneDrive
- iCloud
To use a cloud storage service for your WordPress backups, follow these general steps:
- Sign up for a cloud storage service and create an account.
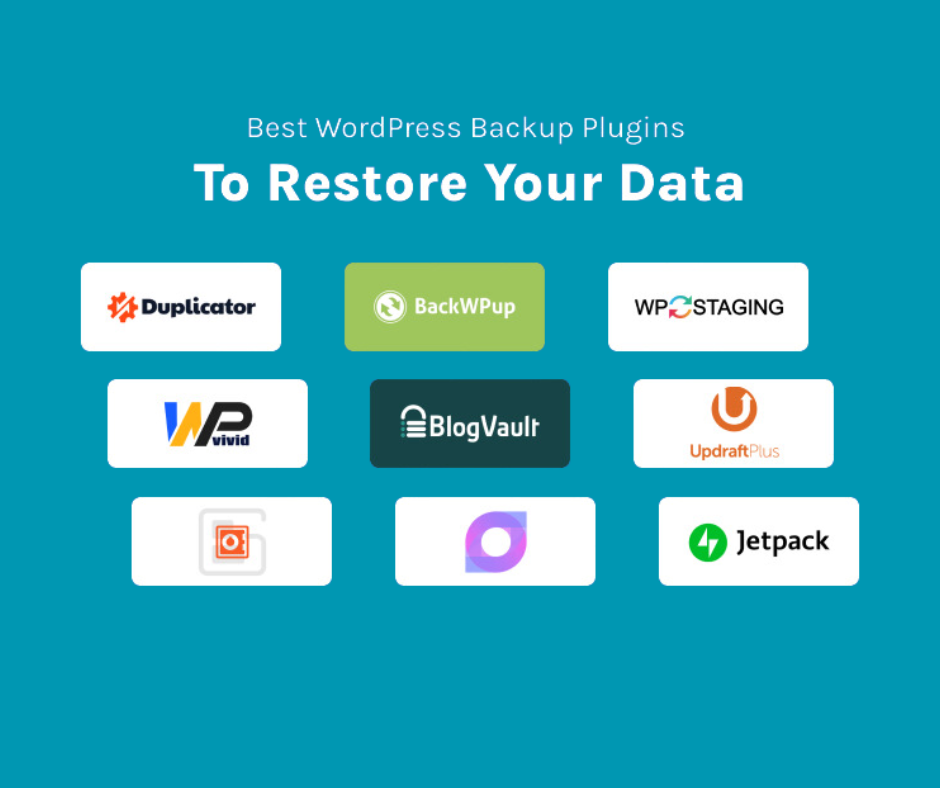
- Install a WordPress plugin that integrates with your chosen cloud storage service, such as “UpdraftPlus” or “BackWPup”.
- Configure the plugin to automatically back up your WordPress website to the cloud storage service of your choice.
- Customize the backup settings, such as the frequency, file types to include, and any exclusions.
- Verify that the backups are being successfully uploaded to your cloud storage account.
Using a cloud storage service for your WordPress backups provides several benefits:
- Offsite storage: Your backup files are stored in a different location than your website, protecting against local disasters or server failures.
- Automatic backups: Many cloud storage services offer automatic backup scheduling, ensuring your website is regularly backed up without manual intervention.
- Easy restoration: In the event of a website failure, you can easily download your backup files from the cloud storage service and restore your WordPress site.
- Versioning: Cloud storage services often provide version control, allowing you to revert to previous versions of your backup files if needed.
Restoring Your WordPress Website from a Backup
Once you’ve created a backup of your WordPress website, it’s important to know how to restore it in case of an emergency. The restoration process can vary depending on the backup method you used, but here’s a general guide:
Restoring from a Plugin Backup
If you used a plugin like UpdraftPlus to back up your WordPress website, the restoration process is relatively straightforward:
- Log in to your WordPress dashboard and navigate to the UpdraftPlus plugin settings.
- Click on the “Restore” tab and select the backup you want to restore.
- Choose the elements you want to restore, such as the database, files, or plugins.
- Click the “Restore” button and follow the on-screen instructions to complete the restoration process.
UpdraftPlus will handle the restoration process, including downloading the backup files, extracting the data, and updating your WordPress installation.
Restoring from a Manual Backup
If you created a manual backup of your WordPress website, the restoration process involves a few more steps:
- Import the database backup file using phpMyAdmin or a similar tool.
- Upload the website files to your web server using an FTP client.
- Update your WordPress configuration files, such as
wp-config.php, to match the new database connection details. - Log in to your WordPress dashboard and verify that the restoration process was successful.
Depending on the size of your website and the complexity of your setup, the manual restoration process may take some time and require technical expertise. If you’re not comfortable with the process, consider seeking assistance from a WordPress professional.
Restoring from a Git Backup
If you used Git to back up your WordPress website, the restoration process is as follows:
- Clone the Git repository to a new server or local environment using the command
git clone [remote_repository_url]. - Set up your WordPress installation by configuring the necessary database connection details in the
wp-config.phpfile. - Install any required plugins, themes, or other dependencies based on the state of the cloned repository.
- Verify that your WordPress website is functioning correctly and all the content and settings have been restored as expected.
Using a Git-based backup approach provides the added benefit of being able to track changes over time and potentially revert to previous versions of your website if needed.
Best Practices for WordPress Backups
To ensure the reliability and effectiveness of your WordPress backups, it’s important to follow best practices. Here are some tips to keep in mind:
Automate the Backup Process
Manually creating backups can be time-consuming and easy to forget. Automate the backup process using plugins or cloud storage services to ensure that your website is regularly backed up without manual intervention.
Diversify Backup Storage Locations
Don’t rely on a single backup location. Store your WordPress backups in multiple places, such as a local hard drive, cloud storage, and a remote server. This redundancy protects against data loss in case of a disaster or hardware failure.
Test Backup Restorations Regularly
Regularly test your backup files by restoring them to a separate environment or a local development server. This will help you identify any issues with the backup process and ensure that your backups are reliable and can be restored successfully.
Secure Your Backup Files
Ensure that your backup files are secure by implementing measures such as encryption, access control, and secure storage. This will protect your website data from unauthorized access or misuse.
Document Your Backup Processes
Keep detailed documentation of your WordPress backup processes, including the tools and methods used, the backup schedule, and any special configurations. This will make it easier to restore your website in the future and ensure continuity if someone else needs to take over the maintenance of your website.
Keep Backups Offsite
Store at least one copy of your WordPress backups in a location that is geographically separate from your website’s hosting environment. This will protect your data in the event of a natural disaster or other local catastrophe.
Conclusion
Backing up your WordPress website is a critical step in maintaining the health and security of your online presence. By following the methods and best practices outlined in this article, you can ensure that your WordPress website is properly backed up and can be restored quickly and efficiently in the event of an emergency.
Remember, a well-executed backup strategy is an investment in the long-term success and resilience of your WordPress website. Take the time to set up and test your backup processes, and you’ll have peace of mind knowing that your website’s data is secure and readily available when you need it.
